The Ultimate Guide to Installing Van Shelving in Your Service Vehicle
Welcome to the ultimate guide to installing van shelving in your service vehicle. If you’re looking to maximize your van’s storage space, this guide is for you. Here, we’ll cover everything you need to know to install van shelving like a pro.
- Measure Your Van:
The first step to installing van shelving is to measure your van’s interior space. Measure the length, width, and height of your van to determine the maximum dimensions of your shelving units. This will help you to maximize your storage space and ensure that your shelving units fit snugly in your van.
- Choose Your Shelving Materials:
When it comes to van shelving, there are a variety of materials to choose from. Some popular options include metal, wood, and plastic. Metal shelving units are durable and can hold a lot of weight, but they can be heavy and difficult to install. Wood shelving units are lightweight and easy to install, but they are not as durable as metal units. Plastic shelving units are affordable and lightweight, but they may not be as sturdy as metal or wood units.

- Plan Your Shelving Layout:
Once you’ve measured your van and chosen your shelving materials, it’s time to plan your shelving layout. Consider what items you’ll be storing in your van and how you want to organize them. You may want to create separate shelving units for different types of tools or equipment.
- Install Your Shelving Units:
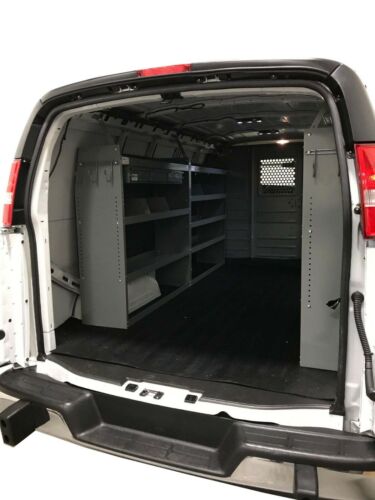
Now that you have your materials and layout planned out, it’s time to install your shelving units. Start by installing the bottom shelf first and work your way up. Use a level to ensure that your shelves are straight and secure them to the van’s walls using screws or bolts. If you’re installing metal shelving units, you may need to weld them in place.

- Secure Your Items:
Once your shelving units are installed, it’s important to secure your items to prevent them from shifting during transport. Use bungee cords or tie-down straps to secure your items to the shelves. You may also want to consider installing a cargo net or divider to separate your items and prevent them from shifting.
- Test Your Setup:
Before hitting the road, it’s important to test your setup to ensure that everything is secure and functioning properly. Take a test drive with your van loaded up and make any necessary adjustments to your shelving units or tie-downs.
Conclusion:
By following these six simple steps, you can install van shelving like a pro and maximize your van’s storage space. Remember to measure your van, choose your materials, plan your layout, install your shelving units, secure your items, and test your setup before hitting the road. With proper installation and maintenance, your van shelving can last for years to come.
Thank you for reading The Ultimate Guide to Installing Van Shelving in Your Service Vehicle. We hope you found this guide helpful. For more tips and tricks on optimizing your service vehicle, be sure to check out our blog.

Take your van storage to the next level with our line of heavy-duty van shelving. So please go ahead and check out our website for further details and pricing.